


 International delivery


Home net installation guide
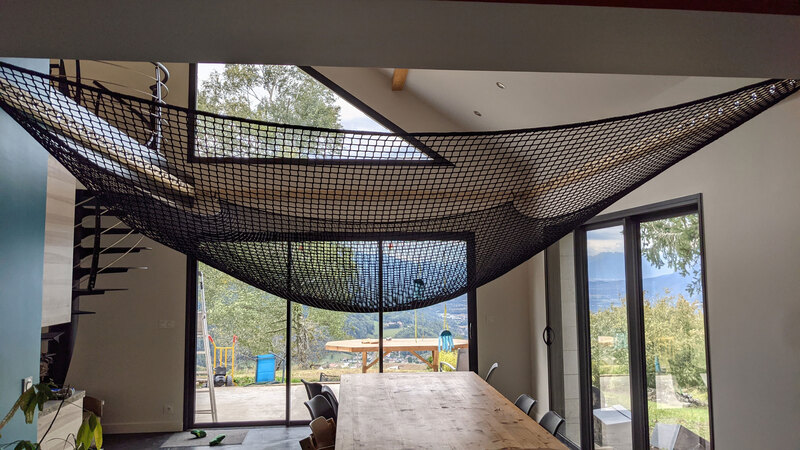
Trendy and contemporary, the custom home net lets you create a relaxing area on a mezzanine while letting daylight filter through.
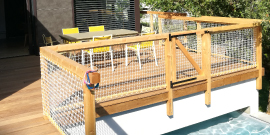
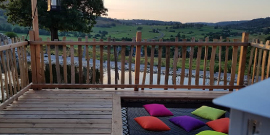
Light and airy, it may also be used as a guard rail when installed vertically. This cost-effective solution is increasingly implemented in both renovations and modern architectural projects.
The home net is custom designed: simply send us the measurements of your void to fill, and your net will be ready within just a few weeks.
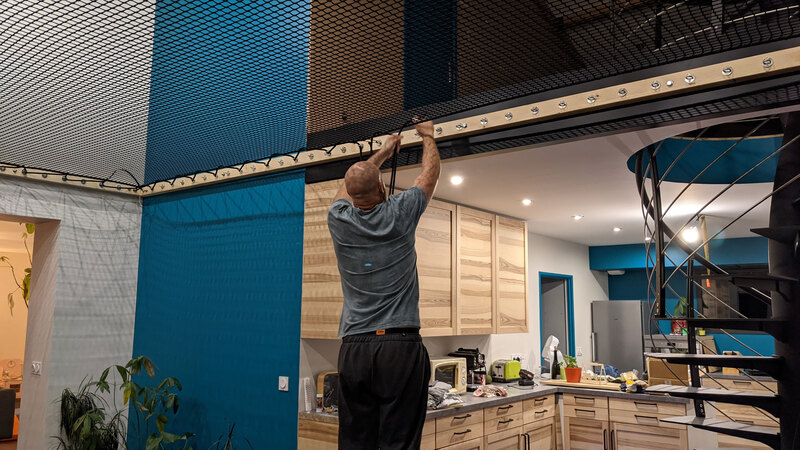
Easy to install, it may be set up by a craftsman or a non-profesionnal. This installation guide will walk you through the main installation steps.
What home net installation structure?
The home net will support the weight of one or several people, and so requires a very solid support structure.
We therefore strongly recommend that your home net be anchored to a solid material.
It may be installed on a wooden, concrete, or steel structure. It may never be installed on plaster board as this isn’t resilient enough.
It may be installed vertically (as a guard rail) or horizontally as a relaxation area.
What fixation system?
The fixation system you need will depend on the type of material on which you install your home net and how you plan on using it.
Aesthetic criteria may also be considered. For example, eye bolts, traditionally used to install catamaran trampolines, will add a nautical touch to your home net.
Four fixation systems are available for a number of supports:
- The zinc-plated 80-mm eyebolt for wooden structures and dowels adapted for concrete and solid surfaces.
- The zinc-plated 120-mm eyebolt for wooden structures and dowels adapted for concrete and solid surfaces.
- The 316 or A4 80-mm stainless steel eyebolt, ideal for outdoor and nautical environments.
- The 316 or A4 stainless steel trigger guard, ideal for outdoor and indoor use.
Once the bolts are installed every 150 mm around the entire perimeter, the tensioning rope can be laced along this same perimeter.
Tensioning ropes?
The tensioning rope is laced between the hardware installed and the net’s bolt rope. As its name implies, it is used to tension your home net.
A Ø10-mm rope is requiree to guarantee the safety on a horizontal home net, whereas a vertically-installed net may use ropes with smaller diameters such as 8mm or 6mm.
Installing the home net
- Install your hardware along the perimeter of your structure; we recommend that they be spaced every 150 mm for optimal weight and tension distribution.

- Center your net in the void, attaching it in the corners.

- Begin lacing the tensioning rope along the sides. The tensioning rope will also be used to re-tension the net from time to time.
After several weeks (or months) of use, your home net will need to be re-tensioned. Please contact us if you have any questions on how to re-tension your net.
How resistant is the net?
Our nets are highly resistant, and have proved themselves in nautical environments. Despite the fact that our polyester, polypropylene, and polyamide nets can withstand heavy loads, we’ve decided to limit their loads to 120 kg per m2, and limit nets larger than 8m2 to one ton. This limit guarantees a reasonable use of the nets, to preserve the integrity of the support structure.
Our nets are designed for users of all ages. Everyone may walk or lie on them in complete safety.
However, the home net is not a trampoline, and is not designed to support jumping and acrobatics. It is strongly recommended that these rules be respected to avoid any damage to the net and supporting hardware.